


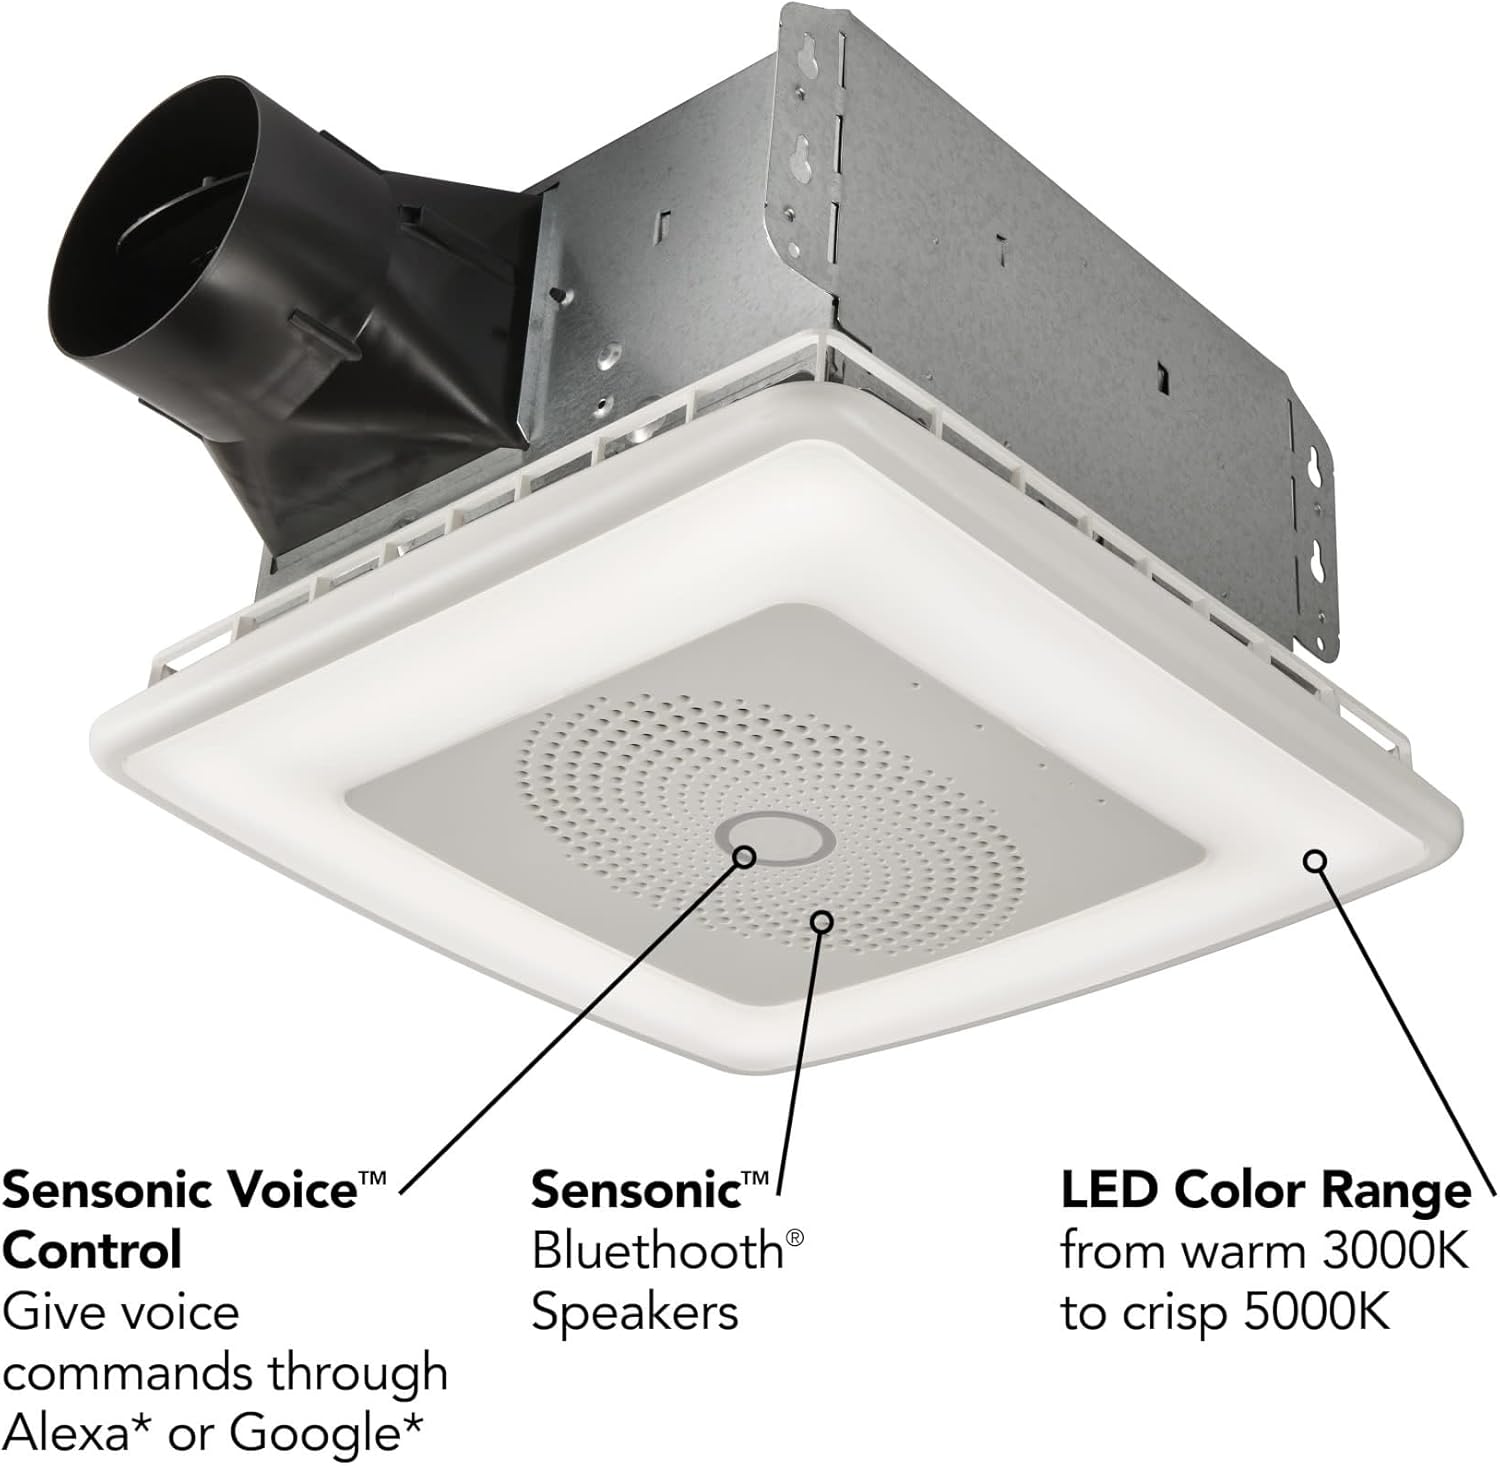
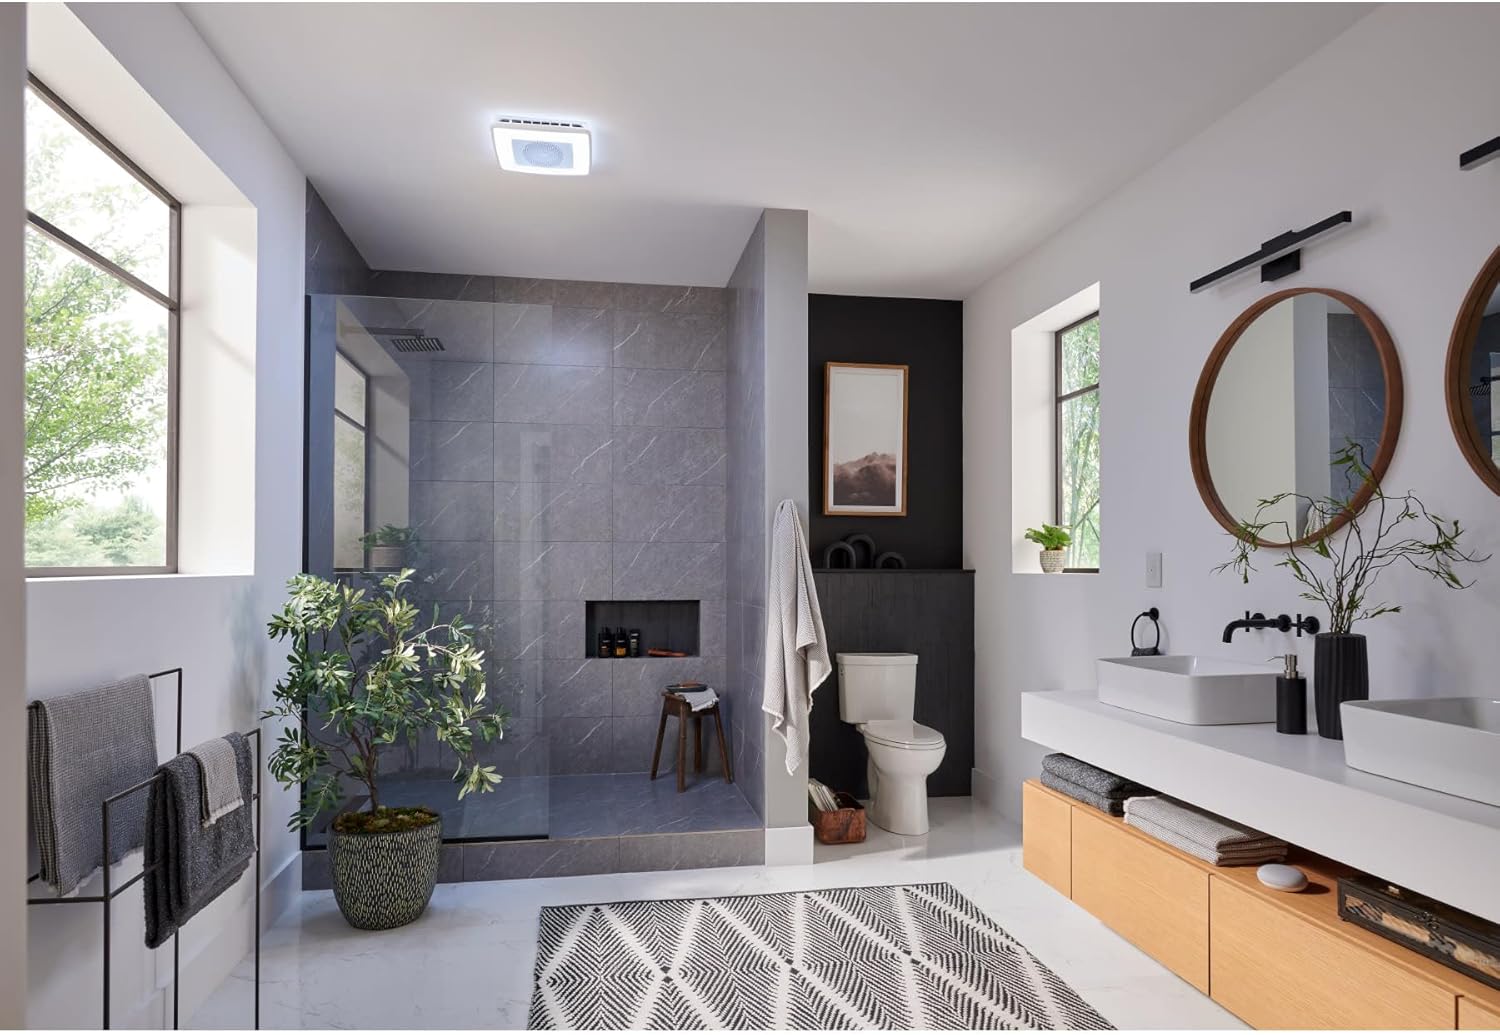


Improve your bathroom with the Broan-NuTone Roomside Series Sensonic Voice Controlled Smart Exhaust Fan. As you prepare for your day, tap into either Amazon Alexa or Google Assistant with the integrated Sensonic Voice control capabilities to ask questions or give commands. Check in on the weather for the day or the news with the Broan-NuTone Voice Control app, and even request CCT lighting settings or fan level adjustments with nothing but your voice. Enjoy your favorite music, podcast, and more from the integrated dual Sensonic speakers, which grant high-quality sound. Spotify connectivity coming soon. This efficient ventilation fan functions at a speed of 110 CFM, effectively clearing humidity, odors and harmful particles the air. The ultra-quiet 1.5 sones of noise blends seamlessly into the background. The pre-set cover offers a modern design, and comes equipped with dimmable LED lights at a CCT range of 3000k for warm light and 5000k for crisp light to provide a flexible light setting over your bathroom mirror or vanity. For simplified Roomside set-up, this ventilation fan is equipped with an EZDuct connector for fast installation without the need for attic access. This highly-efficient vent fan measures 13.25″ x 13.25″ x 5.75″, ideal for overhead installation
SENSONIC CAPABILITIES: Sensonic Voice with Alexa Built-in or connected Google assistant-enabled devices allow your to give commands or ask questions, while dual Sensonic speakers provide a quality sound experience. Spotify connectivity coming soon..Night Light : No, Motion Sensing : No, Rated Amps : 0.75
MODERN BUILT-IN COVER: Equipped with dimmable LED lights and a CCT range of a white light at 3000K-5000k to offer flexible lighting over your mirror or vanity
EASY INSTALLATION: EZDuct connector allows simplified installation without the need for attic access. Reference instillation guide below for most up to date version.
INCLUDED CONTROL REMOTE: Wireless, AAA battery (not included) operated wall control remote also allows for adjustments
ROOMSIDE VENTILATION EXHAUST FAN: Clears steam, odors, and vapors from the bathroom air effectively and quietly, with a 110 CFM operating at 1.5 sones
-88%


dcspo –
FULL INSTALL REVIEW! Good product with great value! The speaker isn’t as bad as people are saying…
I installed two of these today. One went into our master full bathroom and the other one went into a hallway full bathroom.We recently bought a home that was built in 1979, and I had clear attic access to do a full vent/fan/housing replacement. I’ve replaced the fan motors before, but not the full housing.Note: You do NOT have to replace the entire housing with this kit. The cover [which is the light & Bluetooth speaker] can *most likely* be installed by itself on your CURRENT vent/housing.How-to replace the cover and not the entire ventilation housing:**Turn off the electrical breaker for your safety…**1.) Pull down the current plastic cover.2.) Squeeze the metal springs/hooks to remove the cover from the fan housing.3.) Unplug the current fan in the housing. (I would clean out the dust/dirt as best as possible at this point.)4.) Grab the new cover and squeeze the metal springs/hooks to mount it to your existing housing.5.) Plug in the new light/cover where the old fan was plugged into.6.) Plug the old fan plug into the new light/covers plug. It has another plug built into the plug, like an extension cord end.7.) Push up the plastic cover to “close it”, turn the breaker back on, and flip the switch. It should now be discoverable on your Bluetooth device as “FAN SPEAKER”. Connect & Enjoy singing in the shower.[Note: There are many other products on the market designed to just be a cover replacement. I would shop around if you don’t need or want to replace the entire unit.]If you are planning on replacing the full fan/vent/housing, I would check a few things before buying a new bathroom ventilation fan:- Go into your bathroom and pull down the plastic cover. Measure the opening L x W and make a note of it. The “Broan-NuTone SPK80L Bluetooth Speaker Ventilation Fan with LED Light” metal box is 8″ x 8.25″.- Go into your attic and check how your current fan is mounted. Take a picture of it, or make a note of it. (You’ll likely need to pull back some insulation to get to the fan. Be careful while in your attic.)After looking at the existing unit in the attic, ask yourself these questions and make note of the answers:1.) How is it mounted? Is it attached to a ceiling joist? Is it attached to a roof truss?2.) Which side is the unit mounted? Left? Right?3.) Which direction is the duct work going? How is it mounted? Are you going to replace it?4.) Where is the electrical coming from? Is there any slack in the existing wire, if you needed to extend it? **CAUTION: Do NOT touch LIVE wire. Turn OFF your breaker.**Now that I’ve gotten that out of the way, let’s get to how my installation went. I’m going to outline exactly how I did it, and maybe it will help you decide on whether you can take on this project yourself.The hallway full bathroom: (Moderately Easy)1.) I began by turning off the breaker to the bathroom.2.) I ran a hanging light to the bathroom for light. (You could also use a headlamp or anything else.)3.) I pulled down the plastic cover and removed it by squeezing the metal springs/hooks.4.) I unplugged the fan from the metal vent housing.5.) I unscrewed a single screw and then pried down the fan housing and it came out. Some fan assemblies have a screw, a bolt, or sometimes nothing. If there appears to be nothing holding it in, then it likely is just pushed into place and can be pried down and out.6.) **DANGER** PLEASE MAKE SURE YOU SHUT OFF THE ELECTRICAL BREAKER.** The wire nuts were exposed behind the fan and I removed the wire nut caps while still in the bathroom. I also used a non-contact voltage tester to double-check there were no live wires nearby before removing the wire nut caps.7.) I went to the attic and found the fan ventilation housing/box. I removed all nearby insulation to get a decent sized working area and placed the insulation to the side. Be sure to put this back later.8.) I pulled the electrical wiring out of the metal vent housing and pushed it to the side.9.) I removed the 4 screws holding the vent housing and removed it from the drywall opening.10.) The old vent housing was about a half inch smaller than my current opening, so I used a utility knife to cut away some of the drywall to make it fit.11.) I screwed in the new housing to the ceiling joist.(Note: The new housing had a much different orientation than my old one. Based on where the mounting plate was: This made the actual ducted vent to be on the far side from me; whereas the old one was closest to me, the wiring was now closest to me; whereas the wiring before was on the far side.)This is important because it may require you to buy new parts. (i.e.: duct elbows, straight duct pipe, duct extenders, need to cut the duct length, etc.; and with the wiring: you may need to extend the wiring, which would require you to add a junction box if there isn’t any slack in it.)12. After securing the vent’s metal housing to the ceiling joist, I was able to wire it without any issue. The vent kit does not come with a cable clamp connector, where the wiring enters the vent’s metal housing. It just has a metal opening/knockout. Typically, you need to secure the wiring with a clamp where it enters the housing, but if you don’t have one, it’s usually OK to use a nailed or screwed down clamp connector or a staple a few inches from the metal box opening, so it can’t be easily pulled out. I had a 3/8″ NM clamp connector, so it wasn’t a big deal.13. Reinstalling the old duct line. I intended to not reuse the old duct work since it was badly corroded and in bad shape. I wouldn’t have been able to reuse it easily unless I bought a few new connectors anyhow, since it didn’t line up with the new vent housing. I terminated the old duct line and installed a new flex duct line to the roof vent.14. I sealed the gaps around the new bathroom vent where it met up with the ceiling drywall, then placed the insulation back after the sealer dried. You can use caulk, spray foam, or even tape in some cases. It’s your project.15. I turned the breaker back on, flipped the bathroom vent switch, and stood in awe of my achievement. IT worked!!! :)Now for the ugly. The master bathroom. Don’t worry, I’m only going to mention the issues here and not the full process.The master full bathroom: (Moderately Difficult) -1. The old duct line did not match up at all with the new vent housing, since the orientation of the new vent was significantly different. I had intended to replace the entire vent line anyway, and I did with a flex line, just as I did with my other bathroom’s vent install. Not a big deal, but it’s something to pay attention to.2. Based on where the mounting bracket was for this new vent housing, the wiring was now on the opposite side of where it was before. I did not have any slack or extra length of wire available from the old wiring, so I had to add a junction box. This wasn’t a big deal for me, but I did have to go back to the store and get some parts to get it done. (Note: If you need to do this yourself, and you are comfortable doing it, PLEASE, use a metal box in the attic. They’re safer than plastic boxes. Also, keep in mind that junction boxes are not supposed to be covered by insulation, as they are always supposed to be accessible. Check your local codes.)3. The actual L x W of the new vent housing was much smaller than the previous vent that had been installed in this bathroom. Broan’s vent housing for this product is 8″ x 8.25″. The old vent housing was around 9″ x 10.5″, but it actually pushed less air/CFM than this one.After replacing the duct line with flex, adding a junction box to extend the wiring, I had to decide on how to fill the gaps in the drywall around the new ventilation box. I ended up using a scrap 1″ x 3″ piece of wood about 13 inches long to cover the larger opening, then I cut a piece of drywall to attach it to the wood backer. There was about half inch gap on the other side of the drywall, and I used drywall tape and 20 minute quick setting joint compound to fill that 1/2 inch in. I finished the ceiling to match the rest of it and it has blended pretty well.All-in-all, I wish I would have been more prepared going into this project. The hallway full bathroom replacement wasn’t too bad at all, but I had a few surprises going into the master full bathroom replacement. I wish I would have measured the openings beforehand, and I wish I would have been more prepared for where the electrical wiring and duct/vent location was going to be for the new housing.Let me be clear, though, this isn’t Broan’s fault. It’s just things you need to prepare for before taking on a project like this.I tested both light/fan/Bluetooth combos after installing them and they both work great. The music is loud, the fan works well, and the light is good. Hopefully this system works for a long time. It comes with a 3-year limited warranty.I hope this helps someone, and I apologize for being so long-winded!
Jericho –
Great Addition to my Shower Remodel!
I got this fan, light, speaker combination for a shower remodel. I LOVE IT! It was a bit tricky to set up, but I got there fairly quickly. The fan works very well and emits a medium level of noise. The light works well in the space, and I love that the warmth/coolness of the light can be adjusted. The speaker, while not premium sound, works well enough for the shower. It is nice to be able to control the entire system with Alexa app. The wall mounted switch is also very helpful and functional. This was a fantastic addition to the new space, and really adds to the enjoyment. I’m glad a friend suggested it. I am not disappointed!
Micah –
Bad speaker sound.
It’s hard to be too rough on the product. It’s not a sound system. It’s a fan. But it sounds more like a loud speaker than anything. You can definitely jam out in the shower with it, but there is better sounding stuff out there. I’m very tempted to run an amp and speaker set with it. The dimming lights are nice also. Not a fan that the wall switch runs on batteries either. Should have been easy enough to do either or or both. But it works as intended and has a very nice white light so it’s good for makeup or whatever you need.
Holly Miller –
Great sound and fan
I enjoy the sound and the function. Easy to install. Music is great and the price was unbeatable.
Pluto –
Avoid purchasing.
I’ll use the word ‘junk’. I’ve had nothing but issues with this product and their technical/customer support is impossible to contact. The only allow you to submit requests via online form which the then totally ignore. The fan only comes on after pressing the button multiple times each use and the light stopped working altogether. I would avoid buying this product altogether. Will be replacing with a normal fan/light and a timer switch. The Alexa speaker on this Broan is of terrible quality so anything sounds tin can like. Terrible product with zero support.
Eric L –
Clean look, speaker sound as expected, exhaust fan quiet!
Bought two of these used like new… Saw a handful of reviews complain about sound quality but the system defaults to max volume once installed… “Alexa, volume down 5″… Problem solved. Speaker quality is a little above an original dot quality, but again, this is a bathroom exhaust fan, not a home theater system. Love the convenience of asking for music, podcasts, and controlling any other device around my home like I would with alexa/google. I was originally under the assumption that I could change light color, but it’s just 3 shades of white from warm, neutral and cool. Not a deal breaker for me. One call out to be aware of, if you’re replacing an existing switched system, you’ll likely want to hard wire the existing connections so the unit always as power, as the wall “switch” for this is AAA powered and sends signal directly to unit. Comes in a proper single gang with cover plate so you’ll just wire nut the existing wires together in the switch box and install the wall unit on top.
Carrie Brown –
Don’t buy this if you’re looking for the speaker functionality.
I bought 2 of these and had them professionally installed. The lights is nice and the fan works fine. Not super quiet but not super loud either. The blue tooth speaker on one is ok and on the other is it really bad. As in unusable. I would return it except that it would mean paying someone to uninstall and reinstall it again. But the speaker was the reason I went with this model so I’m pretty disappointed.
Marg Mannseichner –
Our contractor found it easy to install, the Bluetooth speaker has good sound, the fan doesn’t drown out the music!We bought this for our secondary bathroom, and have now bought another for our main bath reno.
S –
The Bluetooth is not that loud
Nicole –
Nice bright light, medium noise level fan, sound quality of speaker is decent but wish it was louder and able to connect to Alexa for whole home stereo
Amazon Customer –
The product was exactly like they said I would get, great price and a very solid fan
Adam –
Actually amplifies the sound in the attic and is one bumping little speaker considering how small the speaker is . Def reccommend